> For the complete documentation index, see [llms.txt](https://docs.theshoppad.com/infinite-options/llms.txt). Markdown versions of documentation pages are available by appending `.md` to page URLs; this page is available as [Markdown](https://docs.theshoppad.com/infinite-options/conditional-logic/conditional-logic.md).
# Conditional Logic
Learn how Infinite Options Conditional Logic shows or hides fields based on a shopper's choices, and why both fields must share one Option Set.
:::caution
**Before you start:** Both fields must be in the same Option Set. Conditional Logic cannot show or hide fields across separate Option Sets. If your fields are currently in different Option Sets, move them into one before continuing.
:::
Conditional Logic makes your product page smarter. When a customer makes a selection, the right follow-up options appear automatically, and anything that doesn't apply stays out of the way.
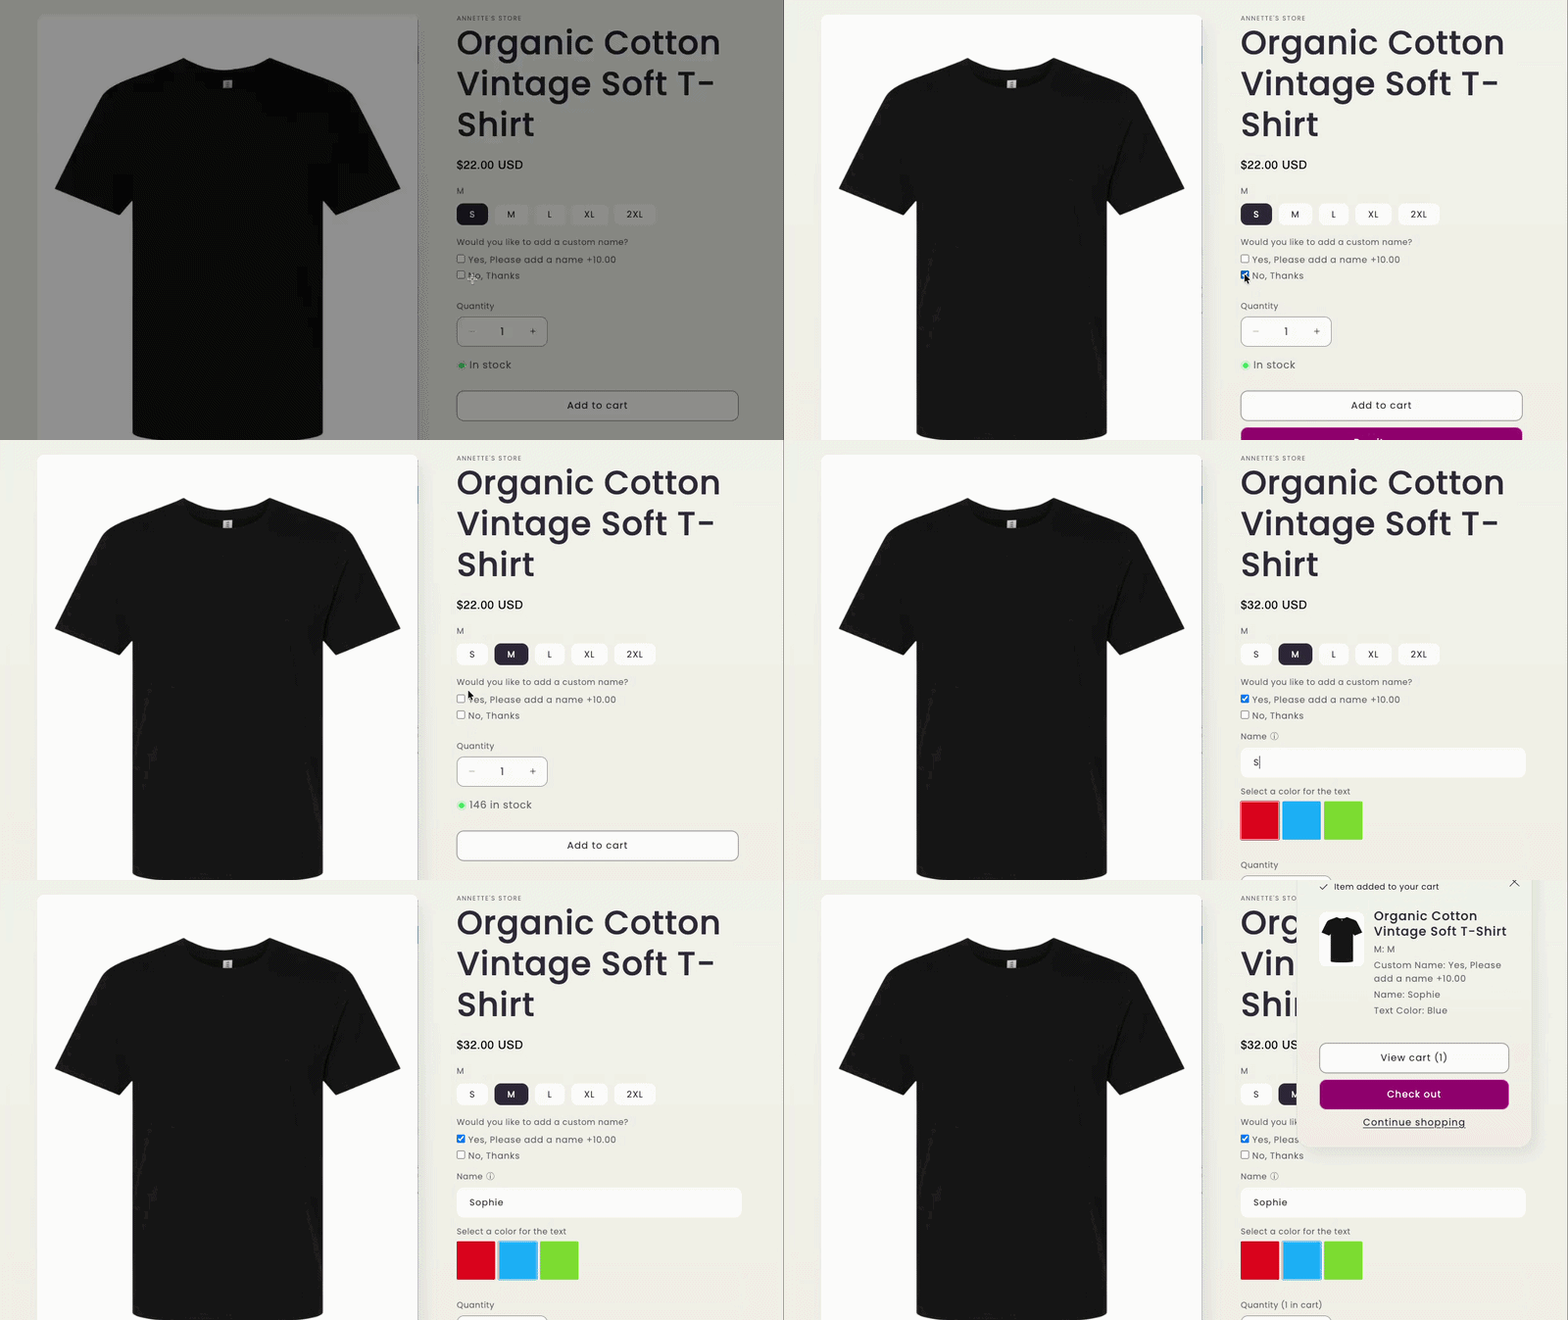
**Example:** \
A shopper selects "Yes" to add a custom name\
A text field appears for them to add the customization\
If they select "No," the text field stays hidden.
***
### How It Works
One selection triggers the next. You decide which field appears when a customer picks a specific option and what should stay hidden.
### Setting It Up
In this example, we'll show a text field for engraving only when a customer selects "Yes." If they select "No," the text field won't appear.
#### Step 1: Create both fields in the same Option Set
Open **Option Sets** in your Infinite Options dashboard and create or open an Option Set.
Add both options inside it:
* **The trigger option** — the choice the customer makes first
* **The dependent option** — what appears based on that choice
:::note
If your fields are already in separate Option Sets, move them into one before continuing. Conditional Logic will not work across separate sets.
:::
***
#### Step 2: Set up the trigger field
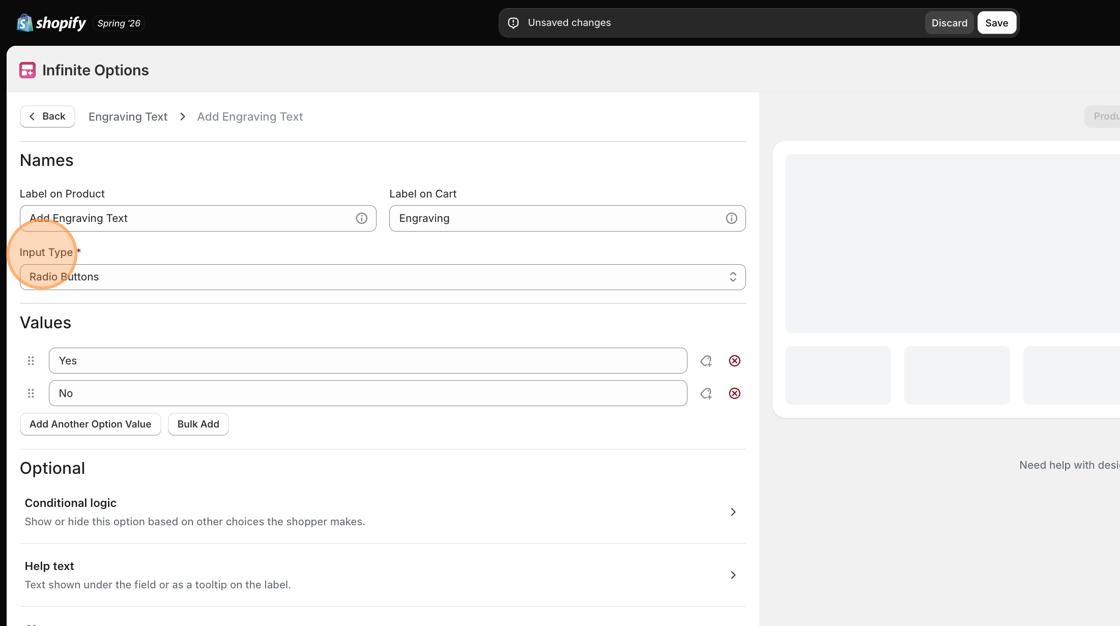
On your option field, set the **Input Type** to Radio Buttons, Checkbox, or Dropdown.
Add the values **Yes** and **No**.
#### Step 3: Set up the dependent field
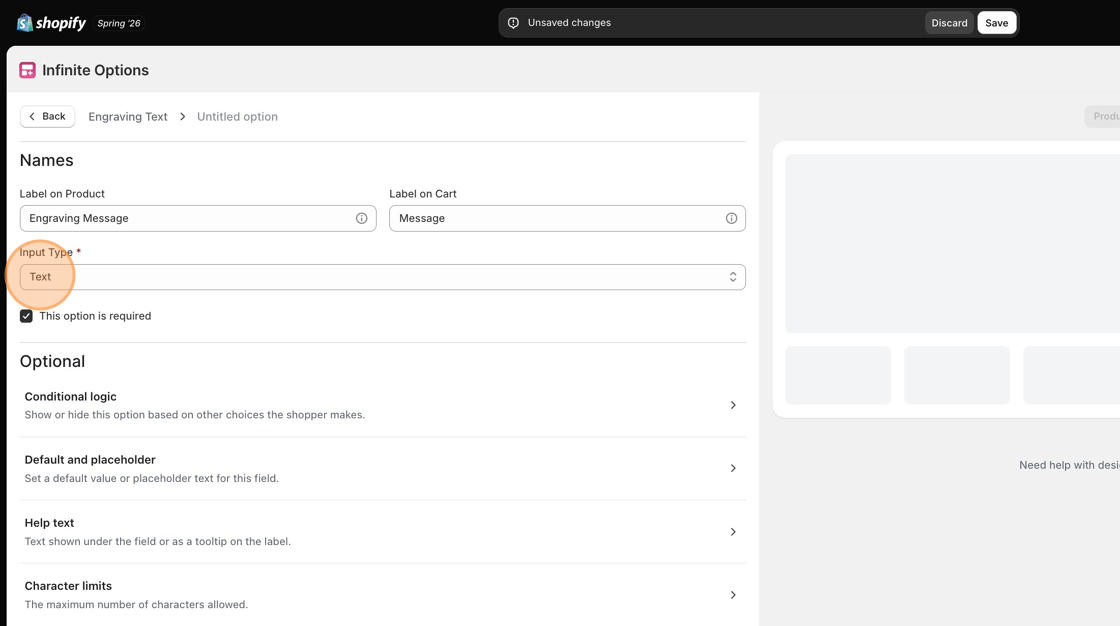
On your second option, set the **Input Type** to **Text**.
#### Step 4: Add the conditional rule
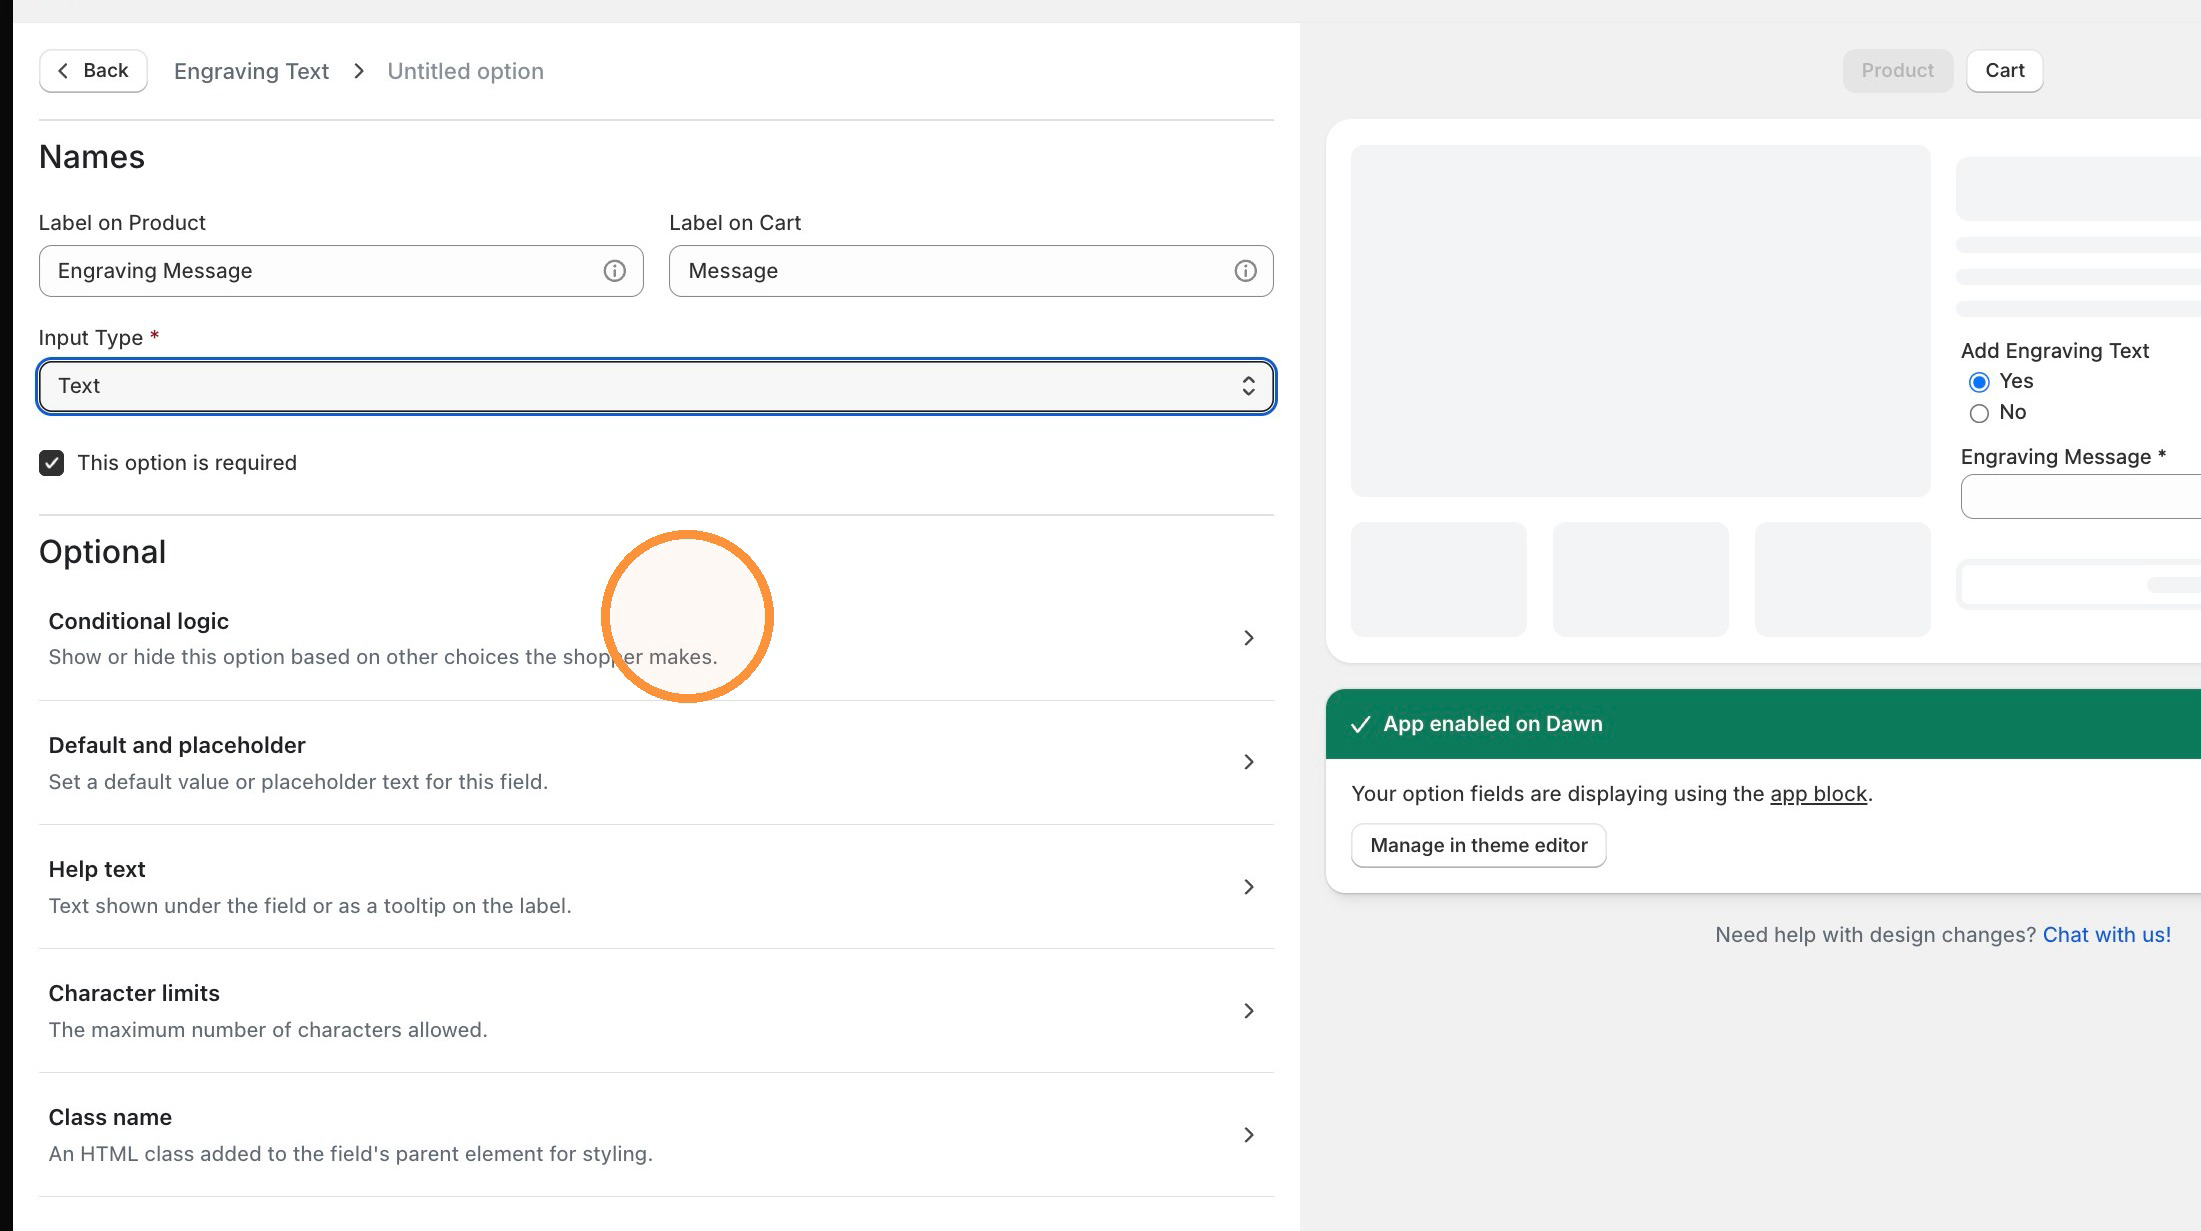
On the second option, click **Conditional logic** within the Optional list.
#### Step 5: Set the rule
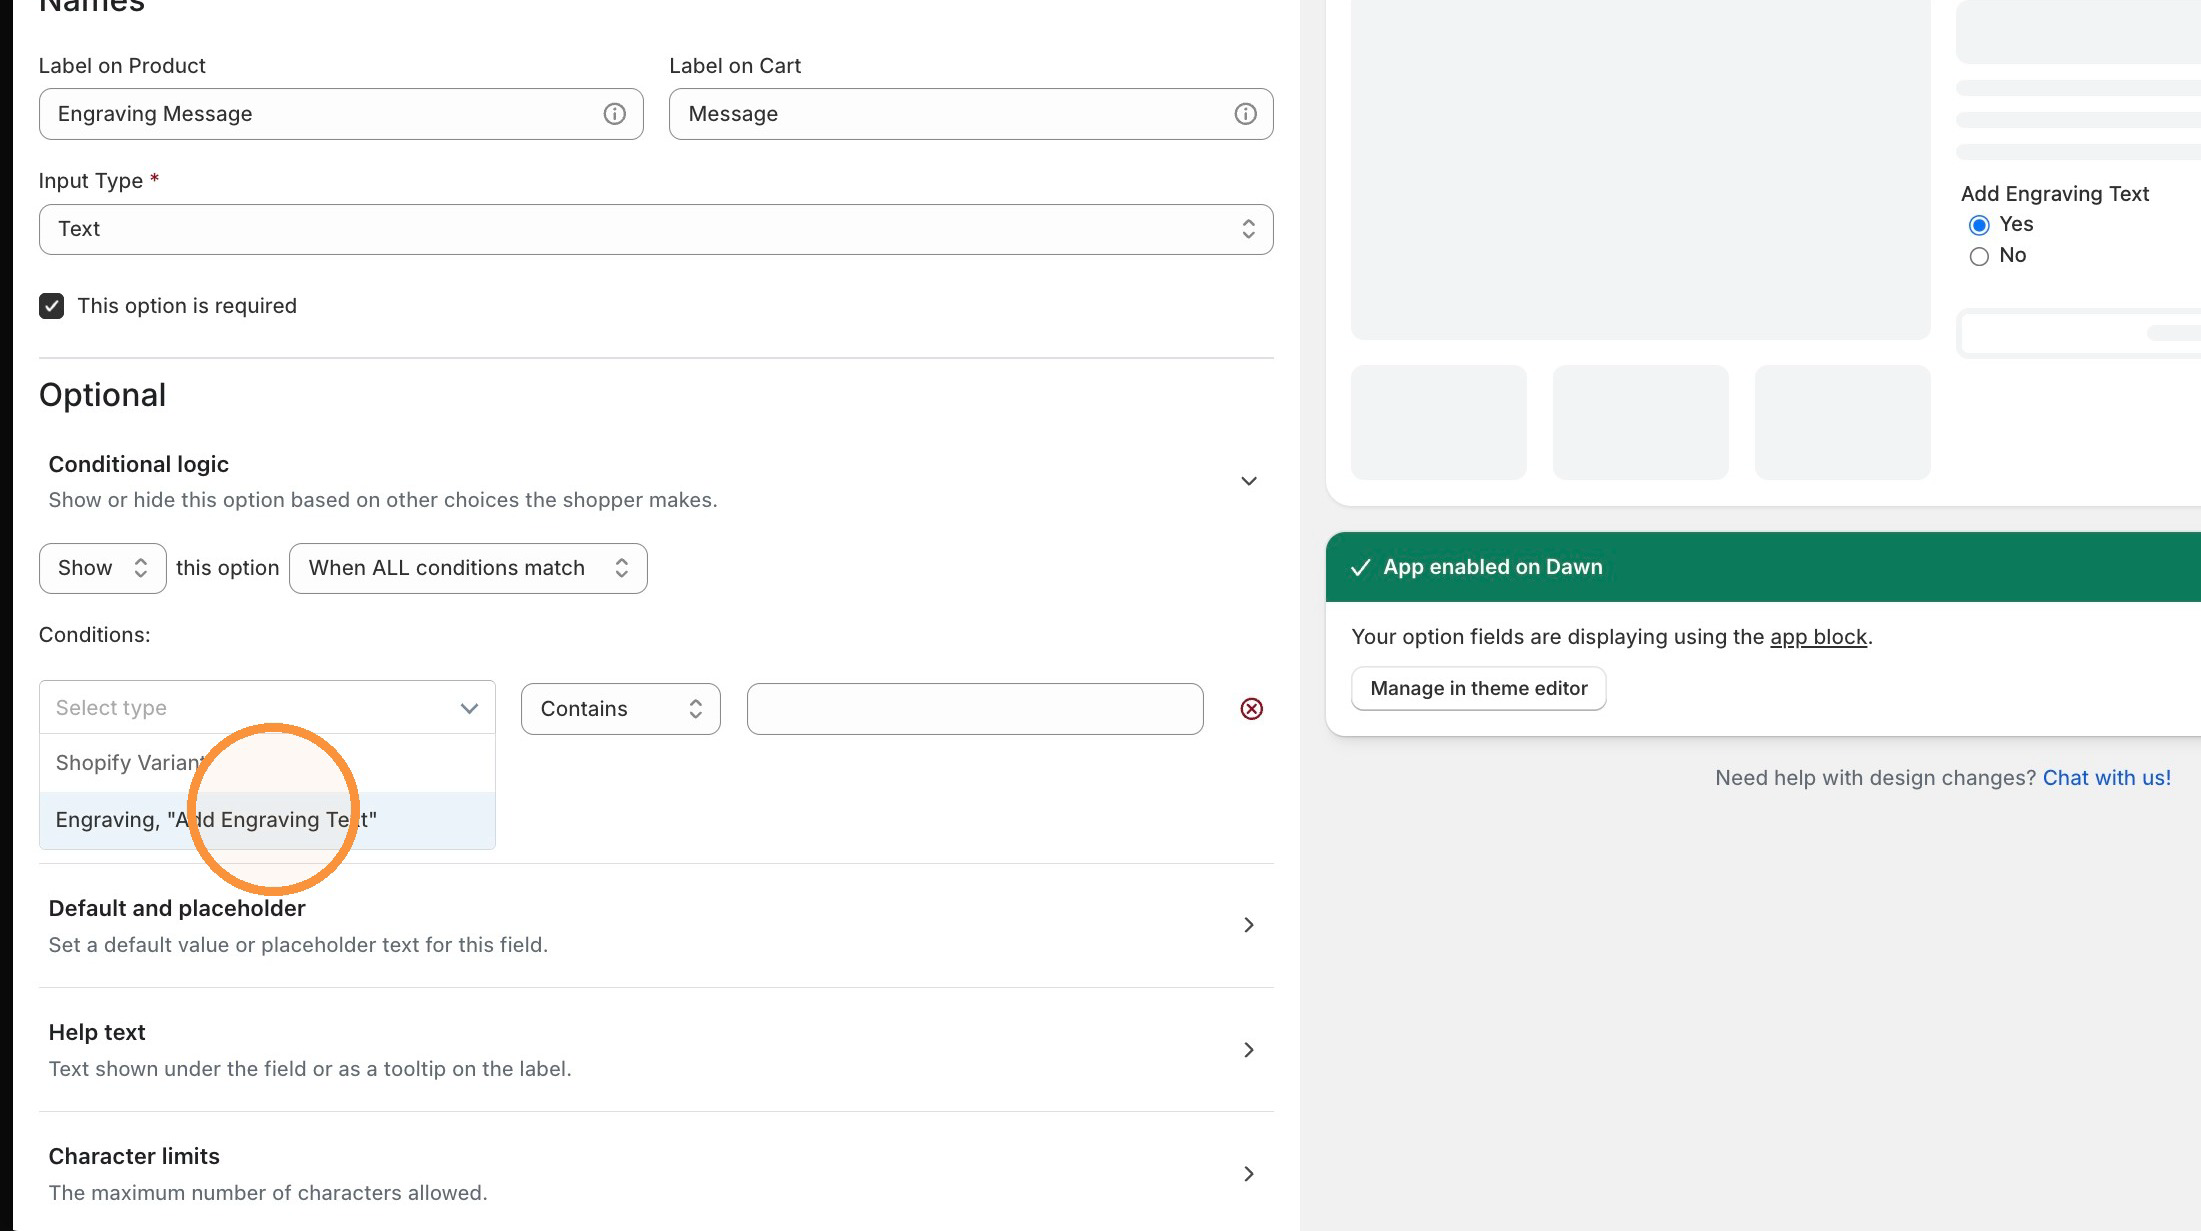
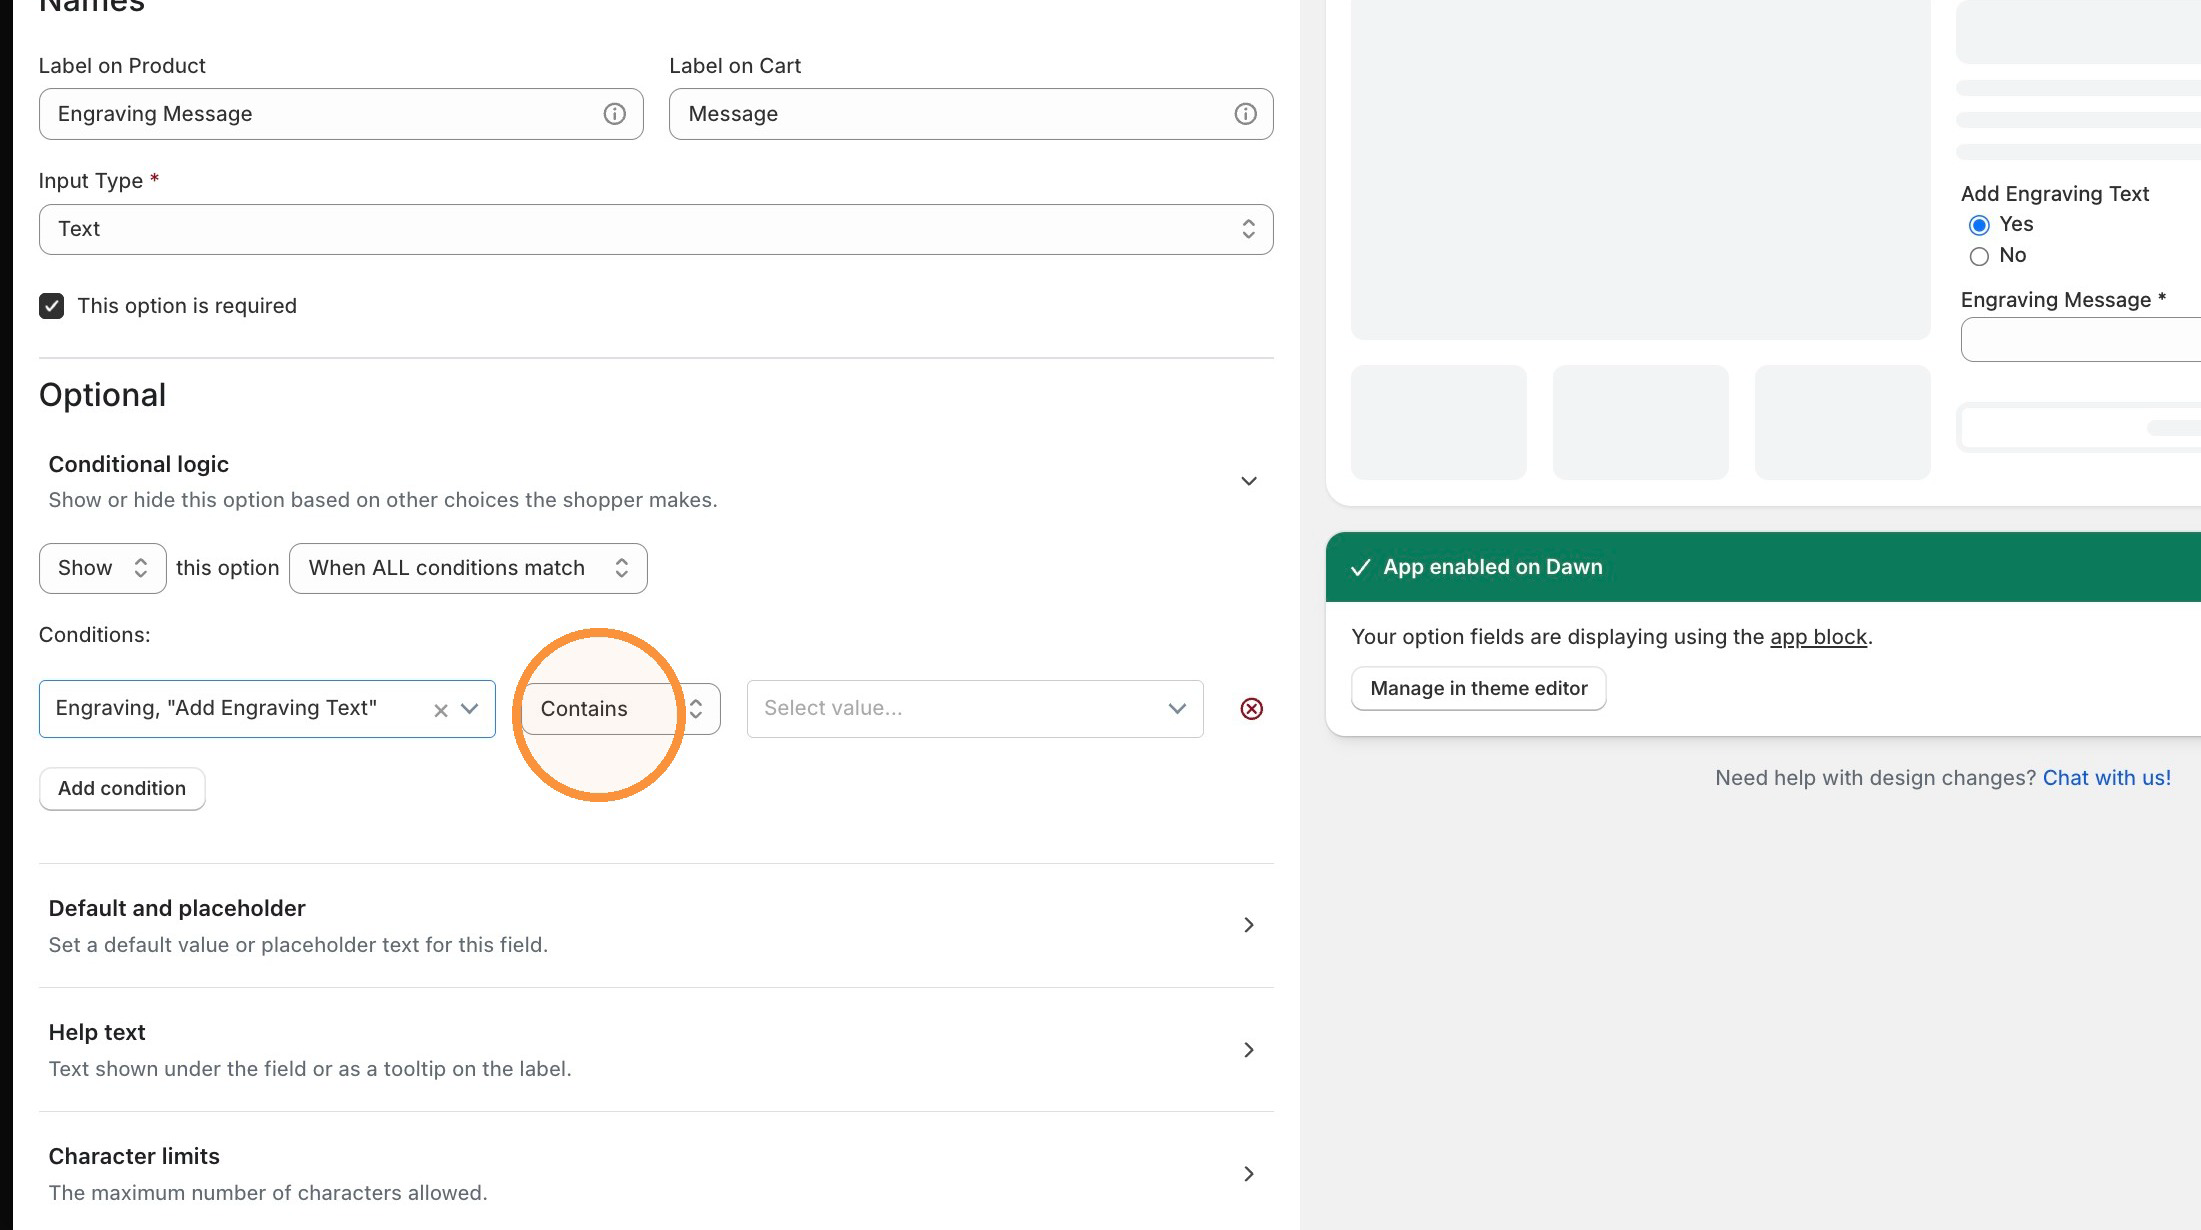
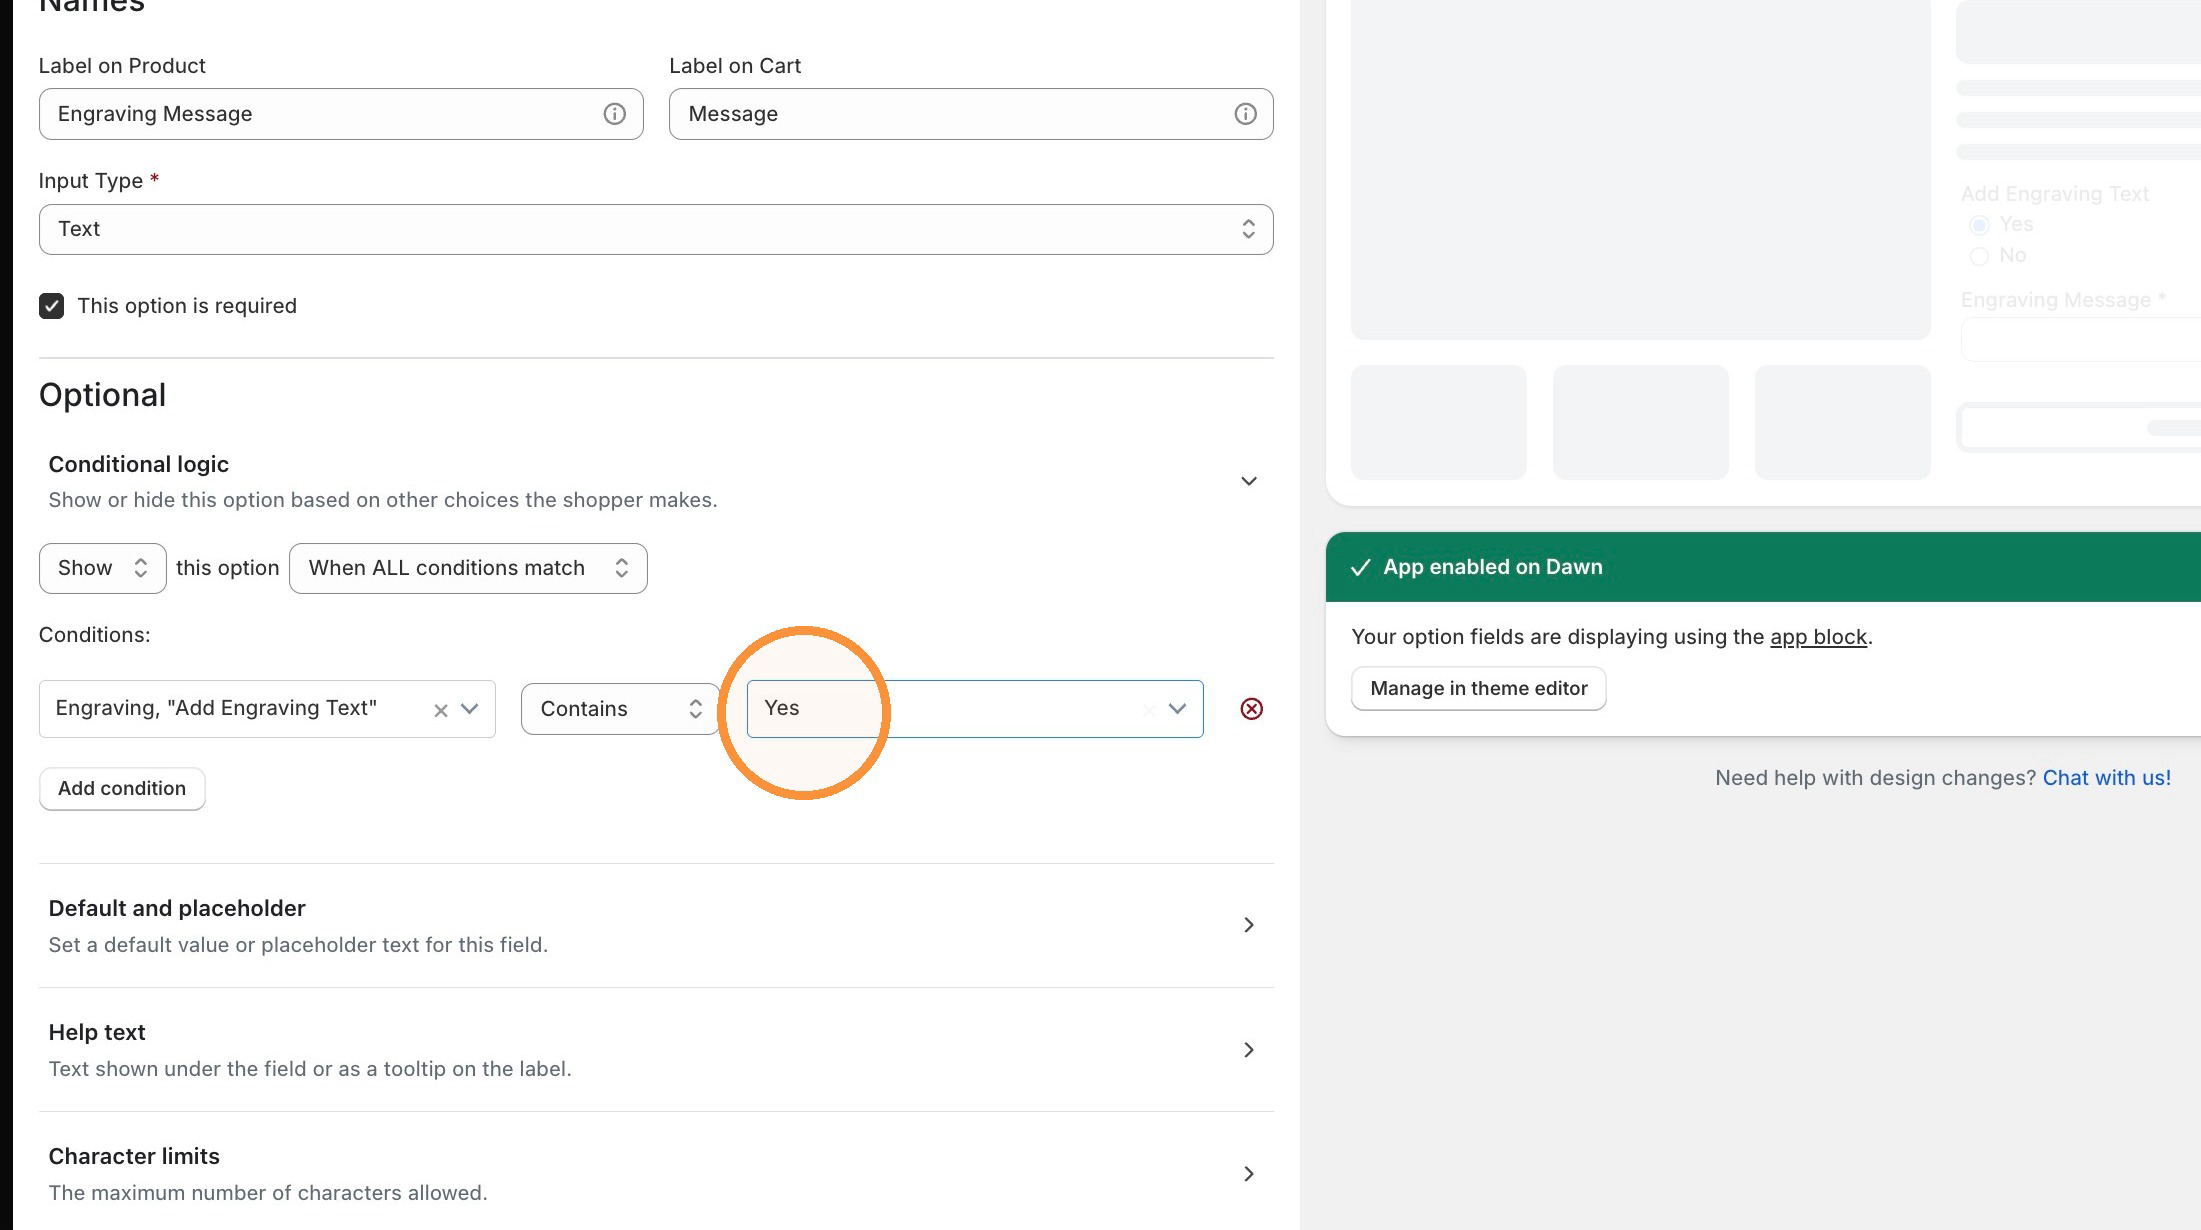
Change the conditions to Show this option When ALL conditions match. Then, setup your conditions:
* **Select Type** — select your trigger option from the dropdown. It can be a Shopify variant or an option in the option set. For this example, we'll select the Engraving option.
* **Operator** — choose **Contains**
* **Select Value** — select **Yes**
#### Step 6: Save
Click Done and **Save Changes** at the top of the page.
Test it on your product page — select "Yes" and confirm the text field appears, then select "No" and confirm it disappears.
#### Previewing your conditional logic
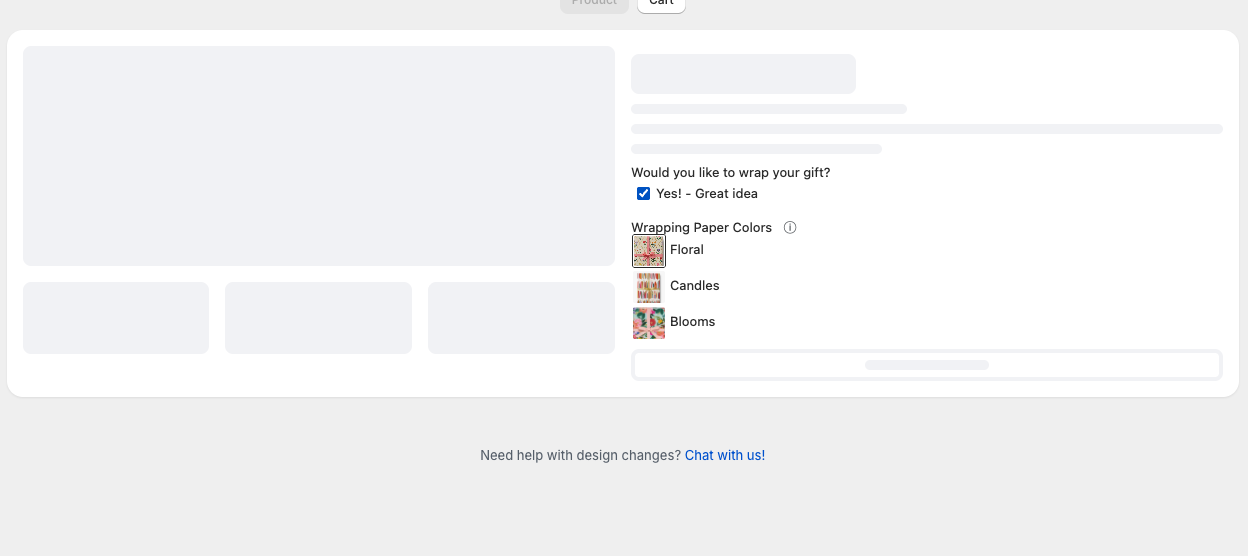
After you've added your conditional rule, you can test it directly in the preview on the right side of the editor.
Interact with your options by selecting a checkbox, radio button, or dropdown value to confirm that the dependent options appear and disappear as expected. For example, selecting **Yes!** displays the gift wrap color swatches.
Once everything looks correct, save your changes to publish them to your storefront.
***
### Tips
* Both fields must be in the same Option Set. This is the most common reason Conditional Logic doesn't work.
* Use **Contains** as your operator. It's more flexible than an exact match and handles small differences like "Yes" vs "yes."
* Test on the live product page, not the Infinite Options preview. The preview doesn't always reflect conditional behavior accurately.
* Group related fields together in your Option Set — it keeps your setup organized and the customer experience logical.
If your logic is set up correctly but still isn't working, see the troubleshooting guide: [Conditional Logic isn't working](https://docs.theshoppad.com/infinite-options/troubleshooting/conditional-logic-isnt-working/)
***
### Something not working?
**The field isn't showing up when the condition is met.** The most common cause is that the conditional rule is attached to a variant field rather than another option field in the same Option Set. Check which field the rule is assigned to and make sure both fields are inside the same Option Set.
**The logic is set up but doesn't seem to be working correctly.** Review the rule carefully. Check that you selected the correct Field Name, that you're using Contains as the operator, and that the value you typed matches exactly what's in the trigger field. A small typo or the wrong field selected is usually the culprit.
**The condition seems to be triggering when it shouldn't.** If you used Is instead of Contains, any capitalization difference will cause unexpected behavior. Switch to Contains and re-test.
**Everything looks right in the app, but it's still not working on the product page.** Make sure the Option Set is assigned to the correct product and that you saved your changes. If it's still not working after that, reach out to support and we'll take a look.