> For the complete documentation index, see [llms.txt](https://docs.theshoppad.com/tracktor/llms.txt). Markdown versions of documentation pages are available by appending `.md` to page URLs; this page is available as [Markdown](https://docs.theshoppad.com/tracktor/get-started/add-tracktor-to-your-stores-navigation.md).
# Add Tracktor to your store's navigation
Add a tracking link to your Shopify store menu by editing a Menus entry under Content, so customers can reach the Tracktor page from any page.
Follow along with the step-by-step instructions or watch the video below to add a tracking link to your store.
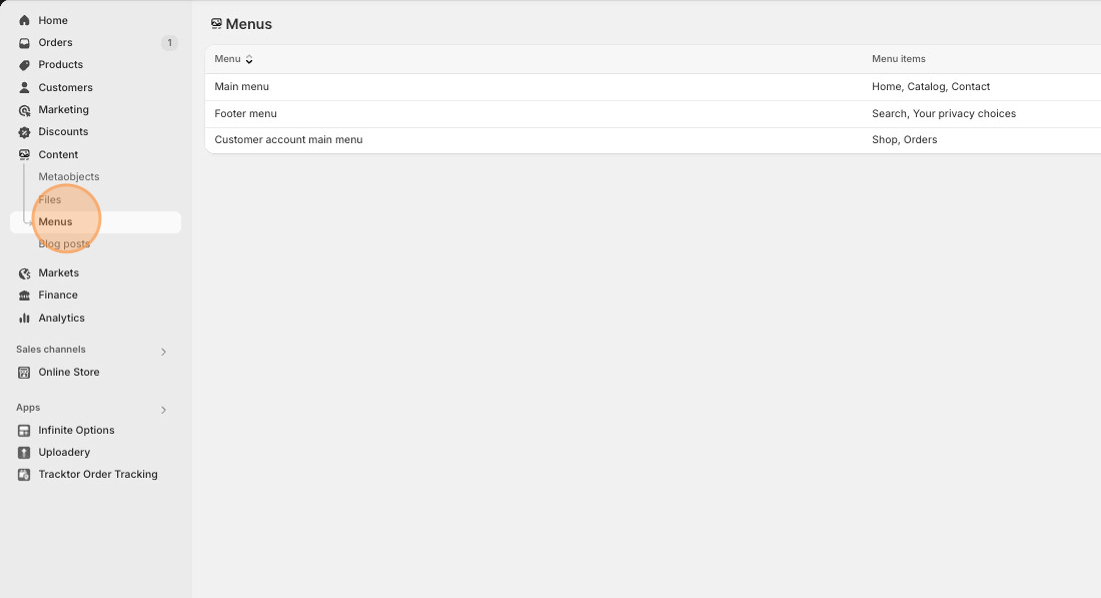
1\. Starting from your Shopify admin dashboard, head to the **Menus** tab located within the **Content** section.
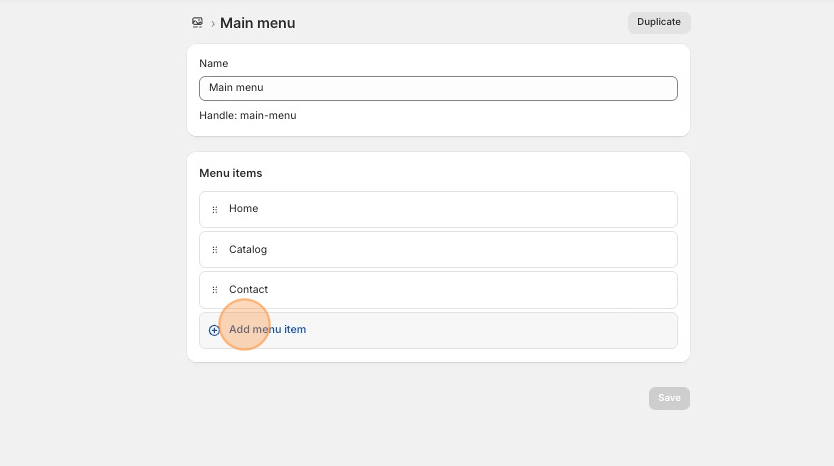
2\. Locate and click on the menu you want to add the link to.
3\. Click on the **Add menu item** button.
4\. Copy the code below
```
/apps/tracktor/track
```
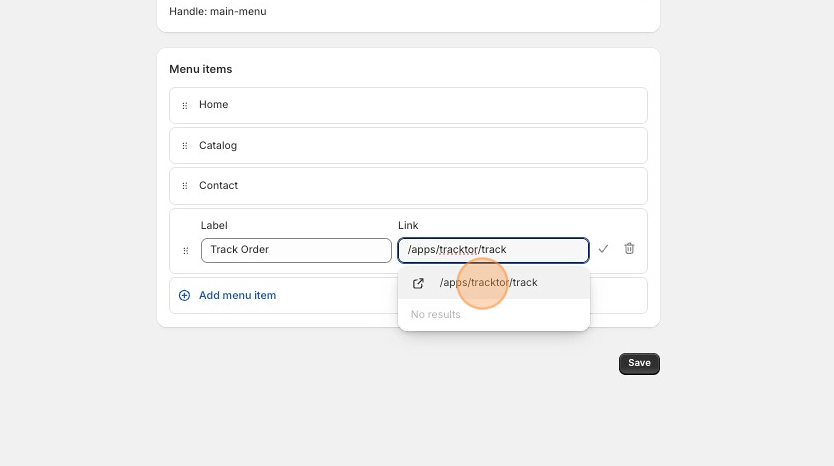
5\. Fill in the **Name** of your page, input the above line within the **Link** section.
6\. Once **/apps/tracktor/track** appears above where you type it in, you'll want to click on it.
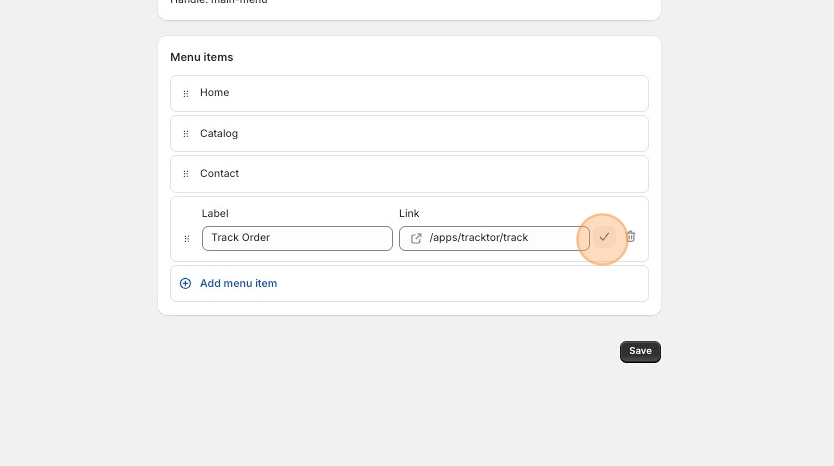
7\. Click the check mark and then click on **Save**.
You can now check out the new tracking page link on your store! 😄