> For the complete documentation index, see [llms.txt](https://docs.theshoppad.com/uploadery/llms.txt). Markdown versions of documentation pages are available by appending `.md` to page URLs; this page is available as [Markdown](https://docs.theshoppad.com/uploadery/install-uploadery/manually-reposition-uploadery-on-a-specific-theme/manually-reposition-uploadery-on-2.0-theme.md).
# Manually reposition Uploadery on 2.0 theme
Follow general steps to add the Uploadery Fields block to any Shopify 2.0 theme product template in the editor when your theme has no dedicated guide.
Turning on the [**Uploadery app embed**](https://docs.theshoppad.com/uploadery/readme/install-uploadery/) is the only thing you need to do to enable Uploadery on a 2.0 theme. Once it's toggled on, your upload fields automatically display above the Add to Cart button on your product pages, no other setup required.
The app embed places your upload fields in the default position, above the Add to Cart button.
Follow the steps below **only if** you want your upload fields to appear at an exact spot instead. This involves the **Uploadery Fields** block to your product template manually.
:::caution
If you are comfortable with your upload fields automatically appearing above the Add to Cart button on product pages, you **do not** need to follow the manual repositioning guides. You only need to ensure that you have [turned on the app embed](https://docs.theshoppad.com/uploadery/readme/install-uploadery/).
:::
:::note
If you switch or publish a new theme in the future, you will need to repeat these steps.
:::
## Step 1: Open the Theme Editor
From your Shopify admin:
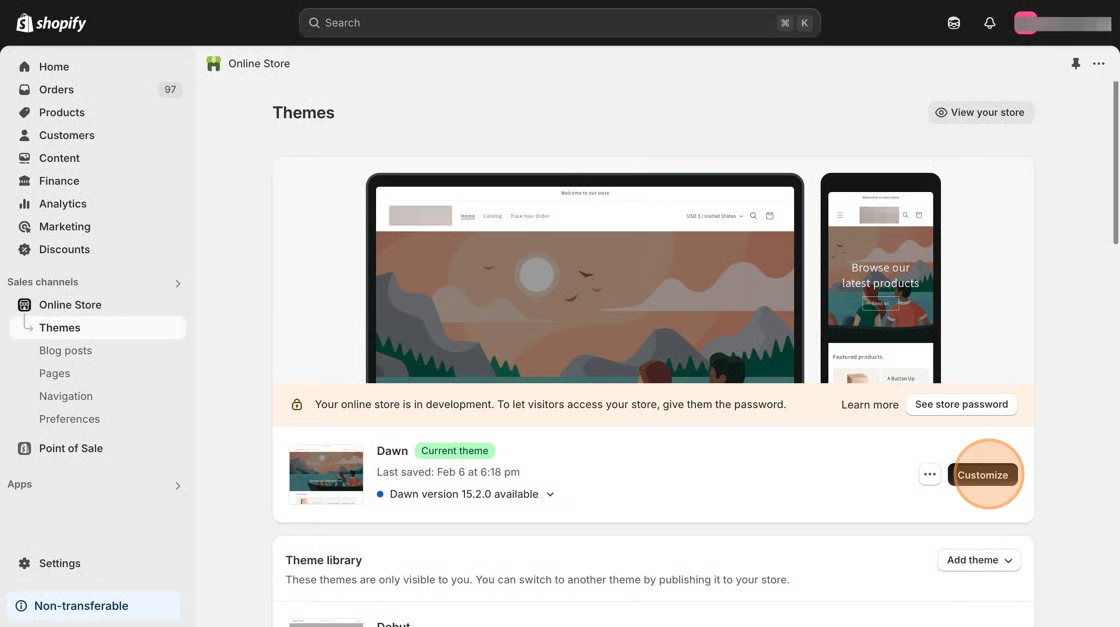
* Go to **Online Store > Themes**.
* Click **Customize** next to your current theme.
## Step 2: Open Your Product Template
At the top of the theme editor:
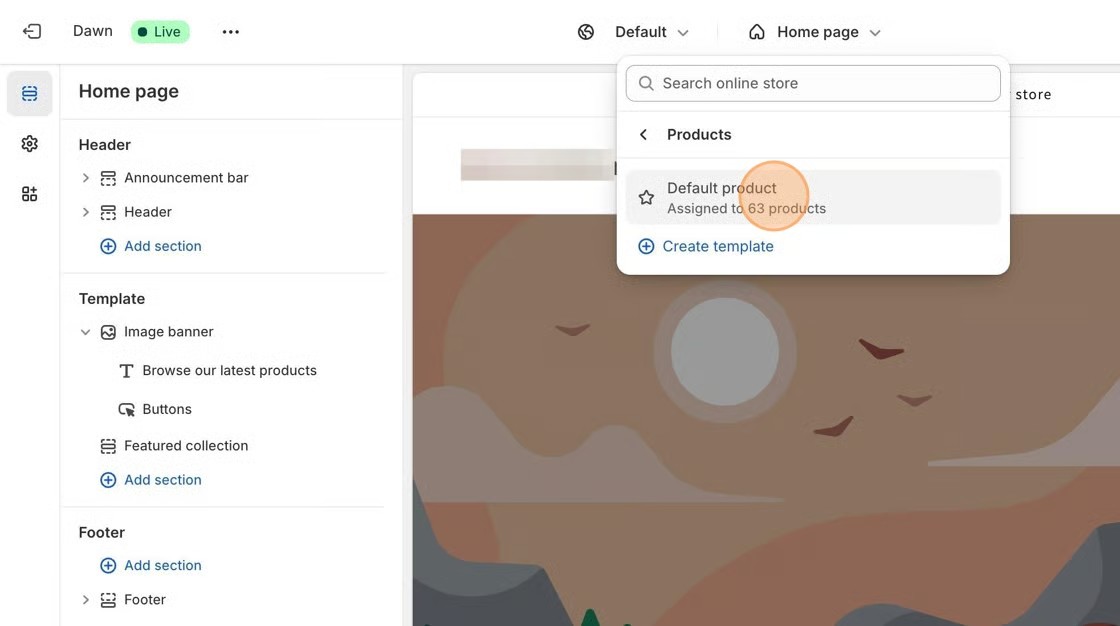
* Click the page selector dropdown.
* Select **Products**.
* Choose your product template.
The product template controls how your product pages look. Most merchants use the **Default product** template.
## Step 3: Add the Uploadery Fields Block
In the left sidebar:
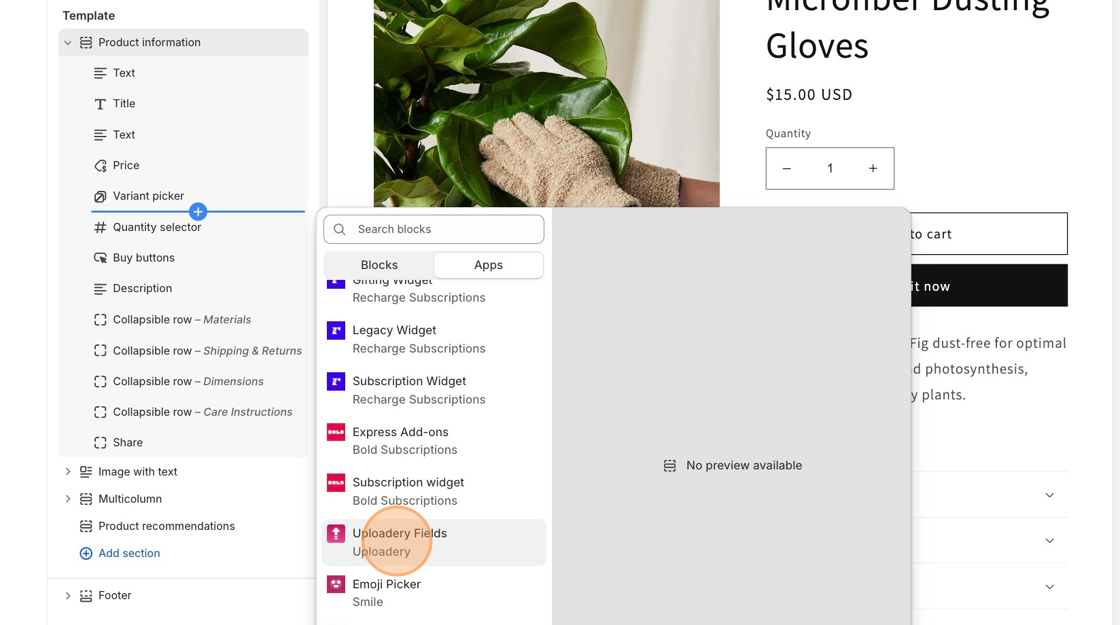
* Locate the section that contains your product information, such as the title, price, variants, and **Add to Cart** button.
* Click **Add block**.
* Open the **Apps** tab.
* Select **Uploadery Fields**.
**Note:** Only add one **Uploadery Fields** block to your product template. It will automatically display every Option Set assigned to that product.
## Step 4: Save Your Changes
Click **Save** in the upper-right corner.
Once you've saved your changes, any Option Sets you create and assign in Uploadery will automatically appear on your product pages.
You can now begin creating upload fields.