
Assign Options by Tag
Show an Infinite Options set on many products at once by tagging them in Shopify and assigning the option set to that tag.
Overview
Section titled “Overview”Assigning by tag is one of the easiest ways to display the same Option Set on multiple products.
Simply add the same Shopify tag to the products that should display your options, then assign your Option Set to that tag. Any product with the tag will automatically display the Option Set.
Before You Start
Section titled “Before You Start”Before following these steps, make sure:
- The Infinite Options Fields block has been installed on your theme.
- You’ve created and saved your Option Set.
Step 1: Add a Tag to Your Products
Section titled “Step 1: Add a Tag to Your Products”In your Shopify admin:
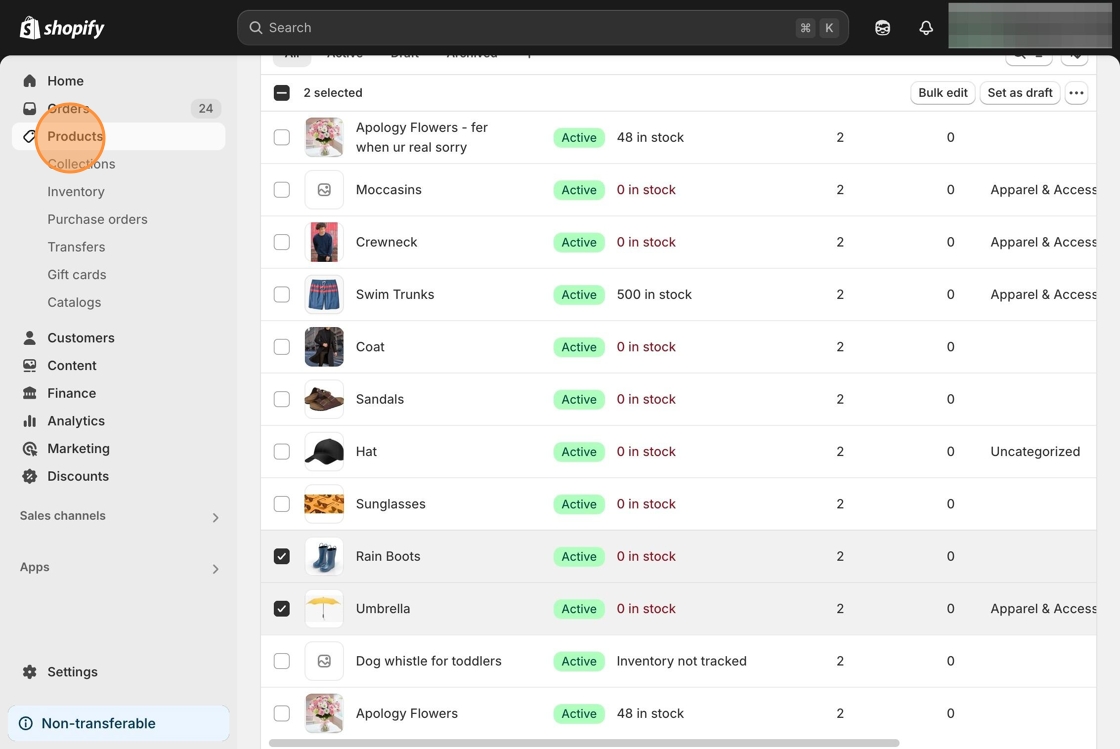
- Go to Products.
- Select the products that should display the same options.
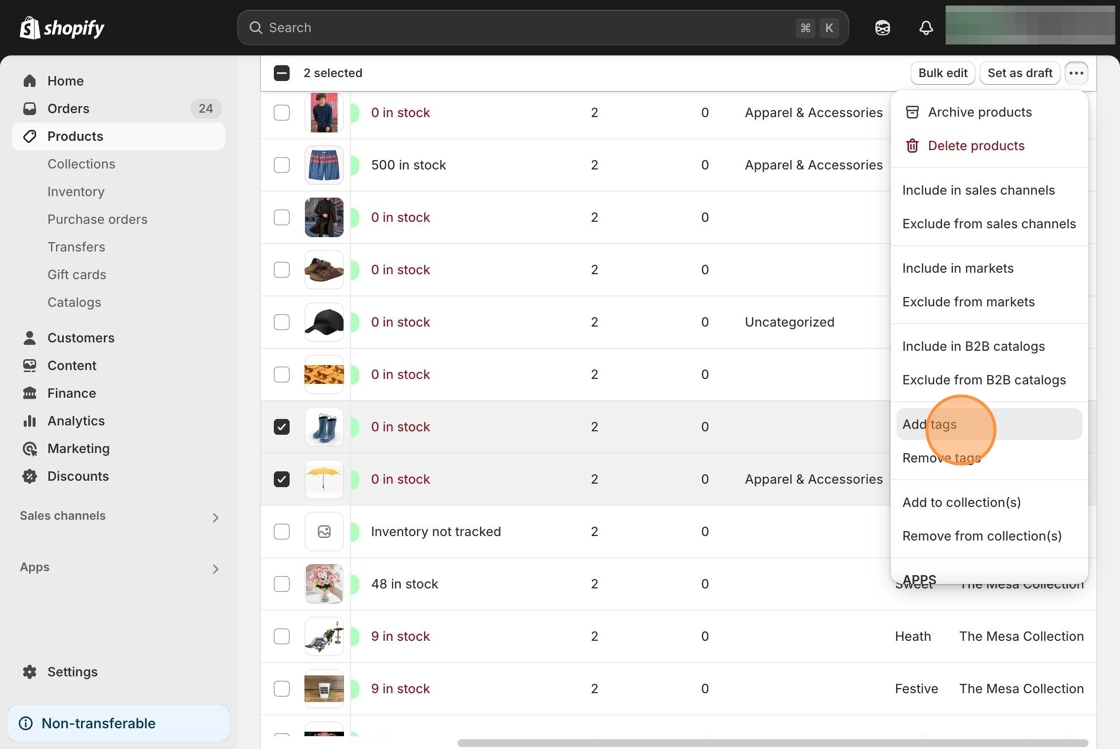
- Click the three dots (⋯) above the product list, then select Add tags.
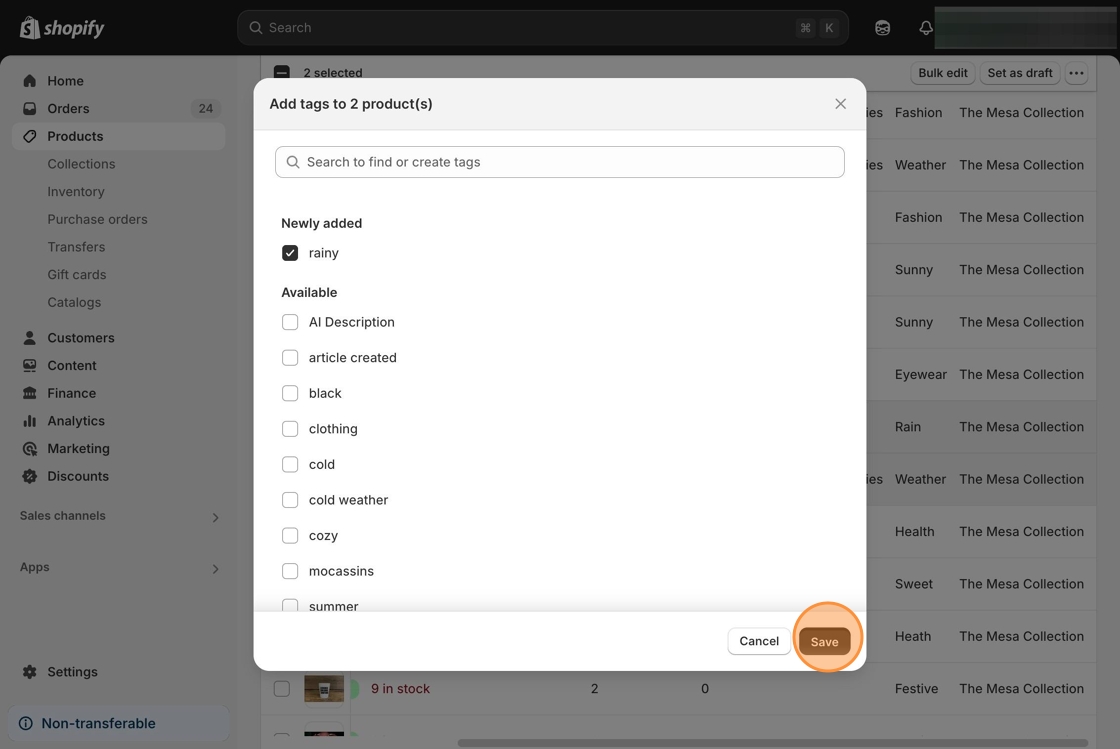
- Enter a descriptive tag.
- Click Save.
Step 2: Open Your Option Set
Section titled “Step 2: Open Your Option Set”- Open the Infinite Options app.
- Open an existing Option Set or create a new one.
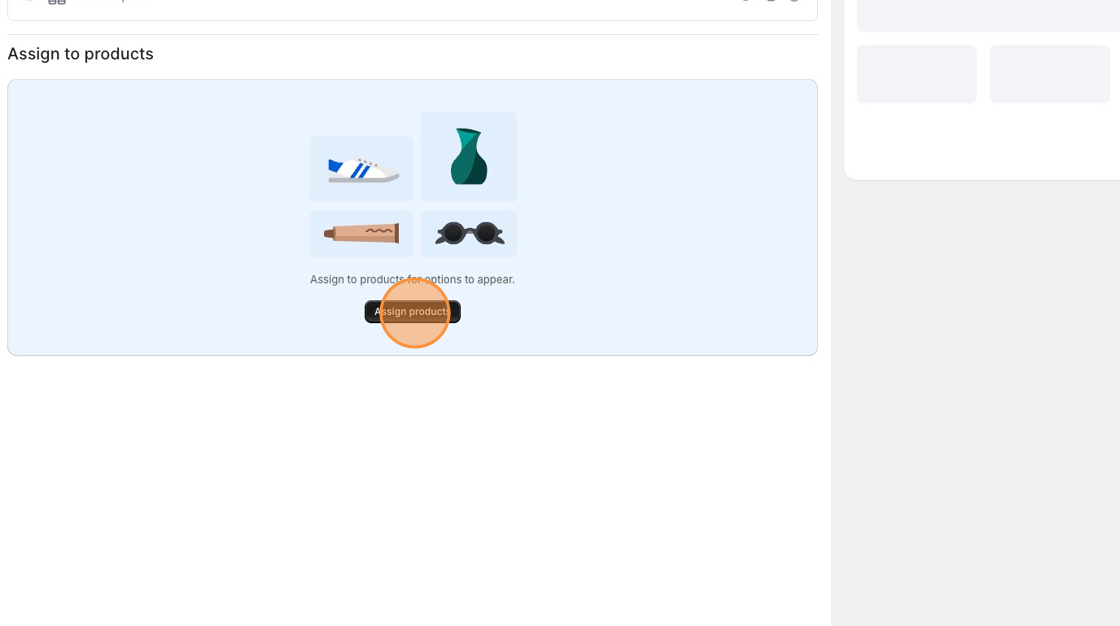
- Scroll to the Assign to products section.
Step 3: Assign Your Option Set
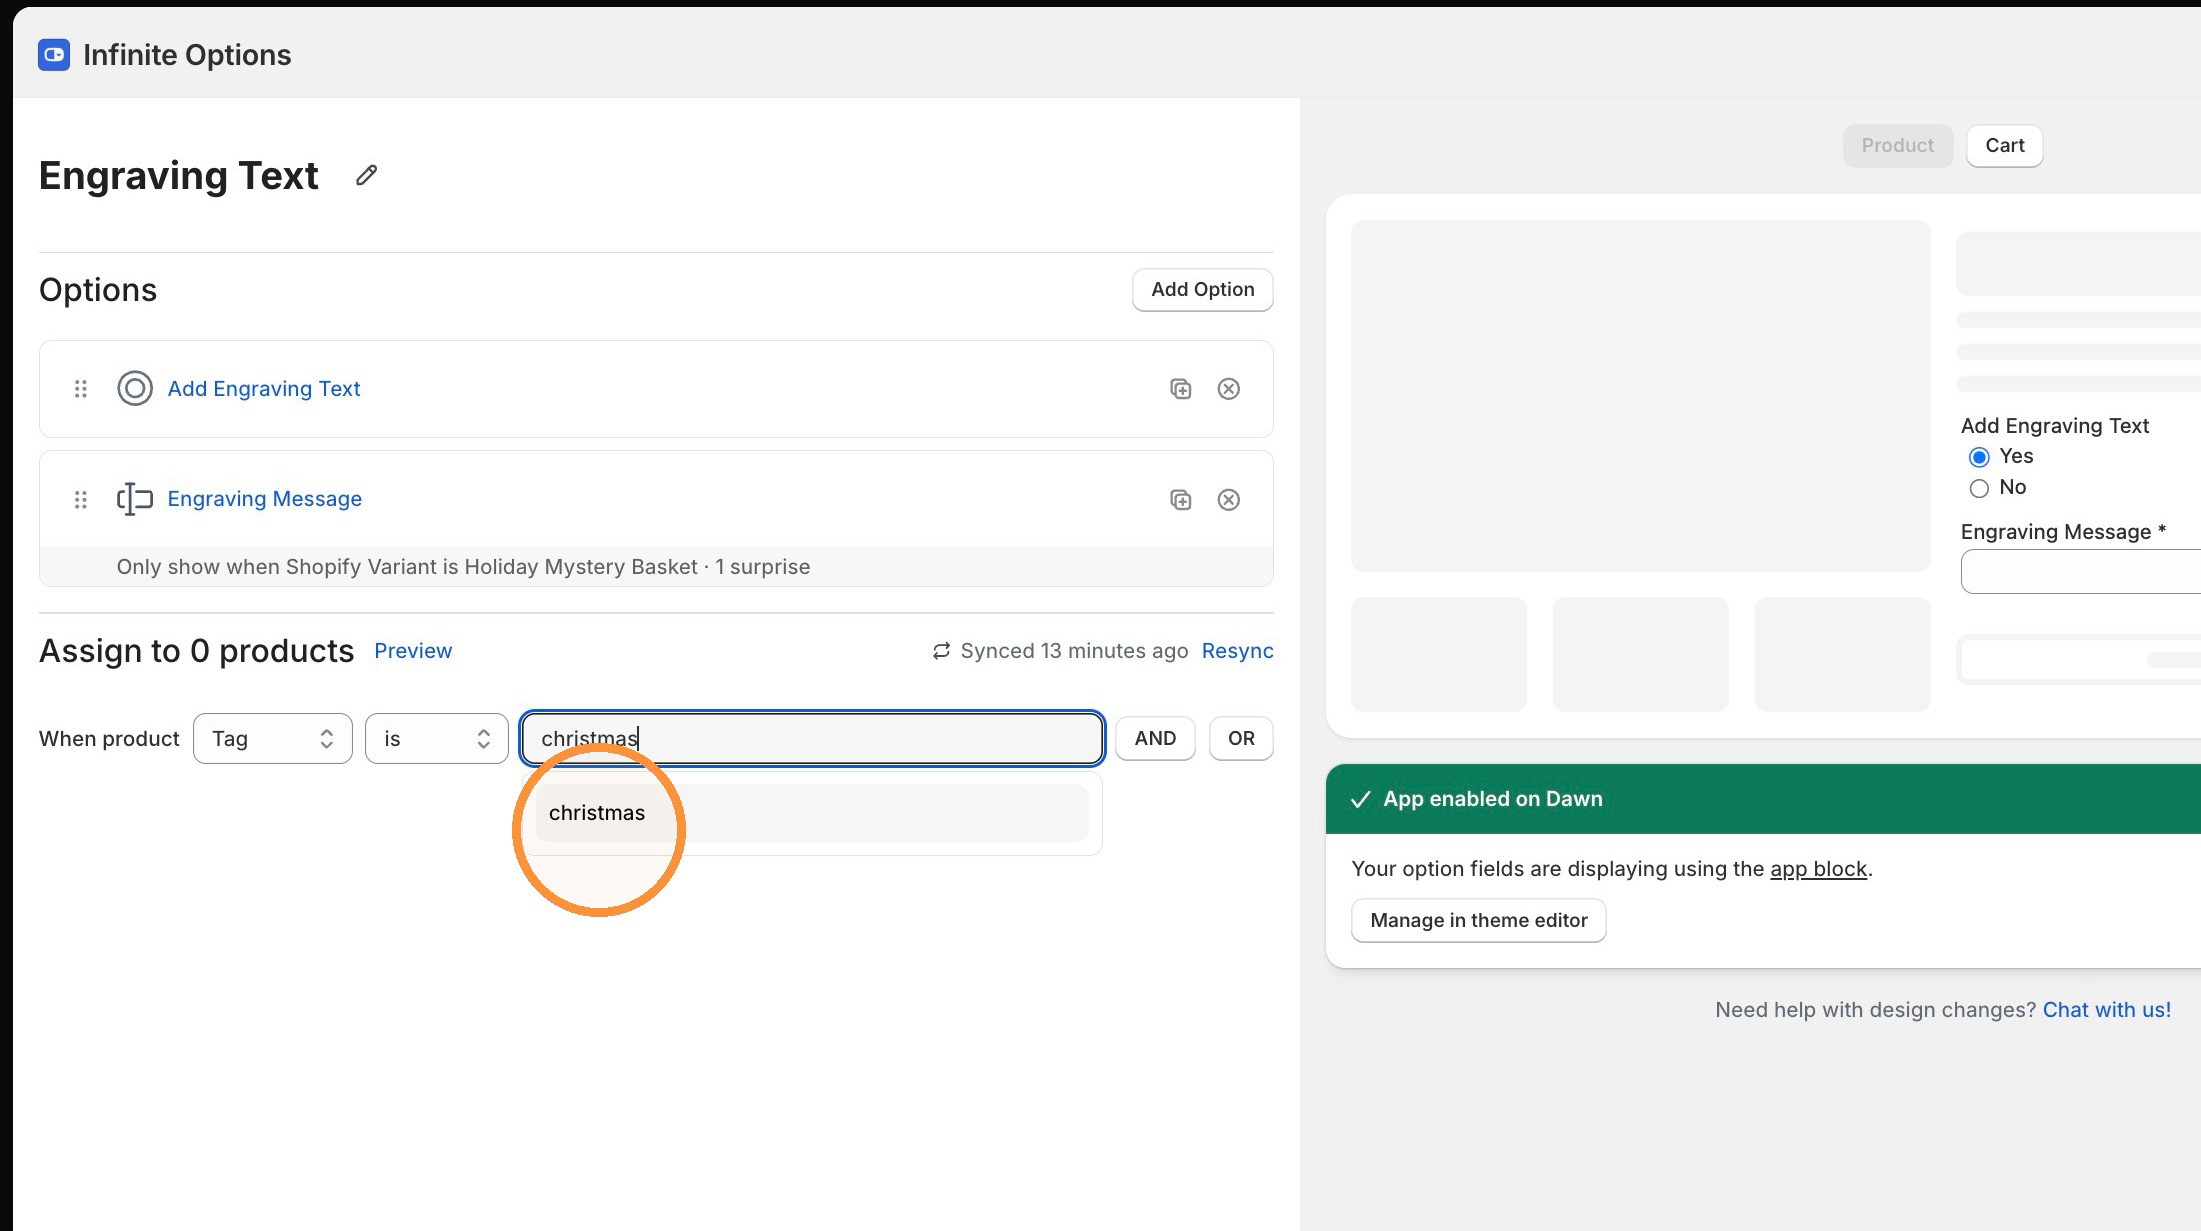
Section titled “Step 3: Assign Your Option Set”- Click Assign products.
- Select Product Tag.
- Enter the tag you created in Shopify.
- Select the matching tag from the dropdown.
- A rule row will appear: When product [dropdown] is [field]
- Use the dropdown to select Tag
- Enter the exact tag name you added in Shopify
Step 4: Preview Your Assignment
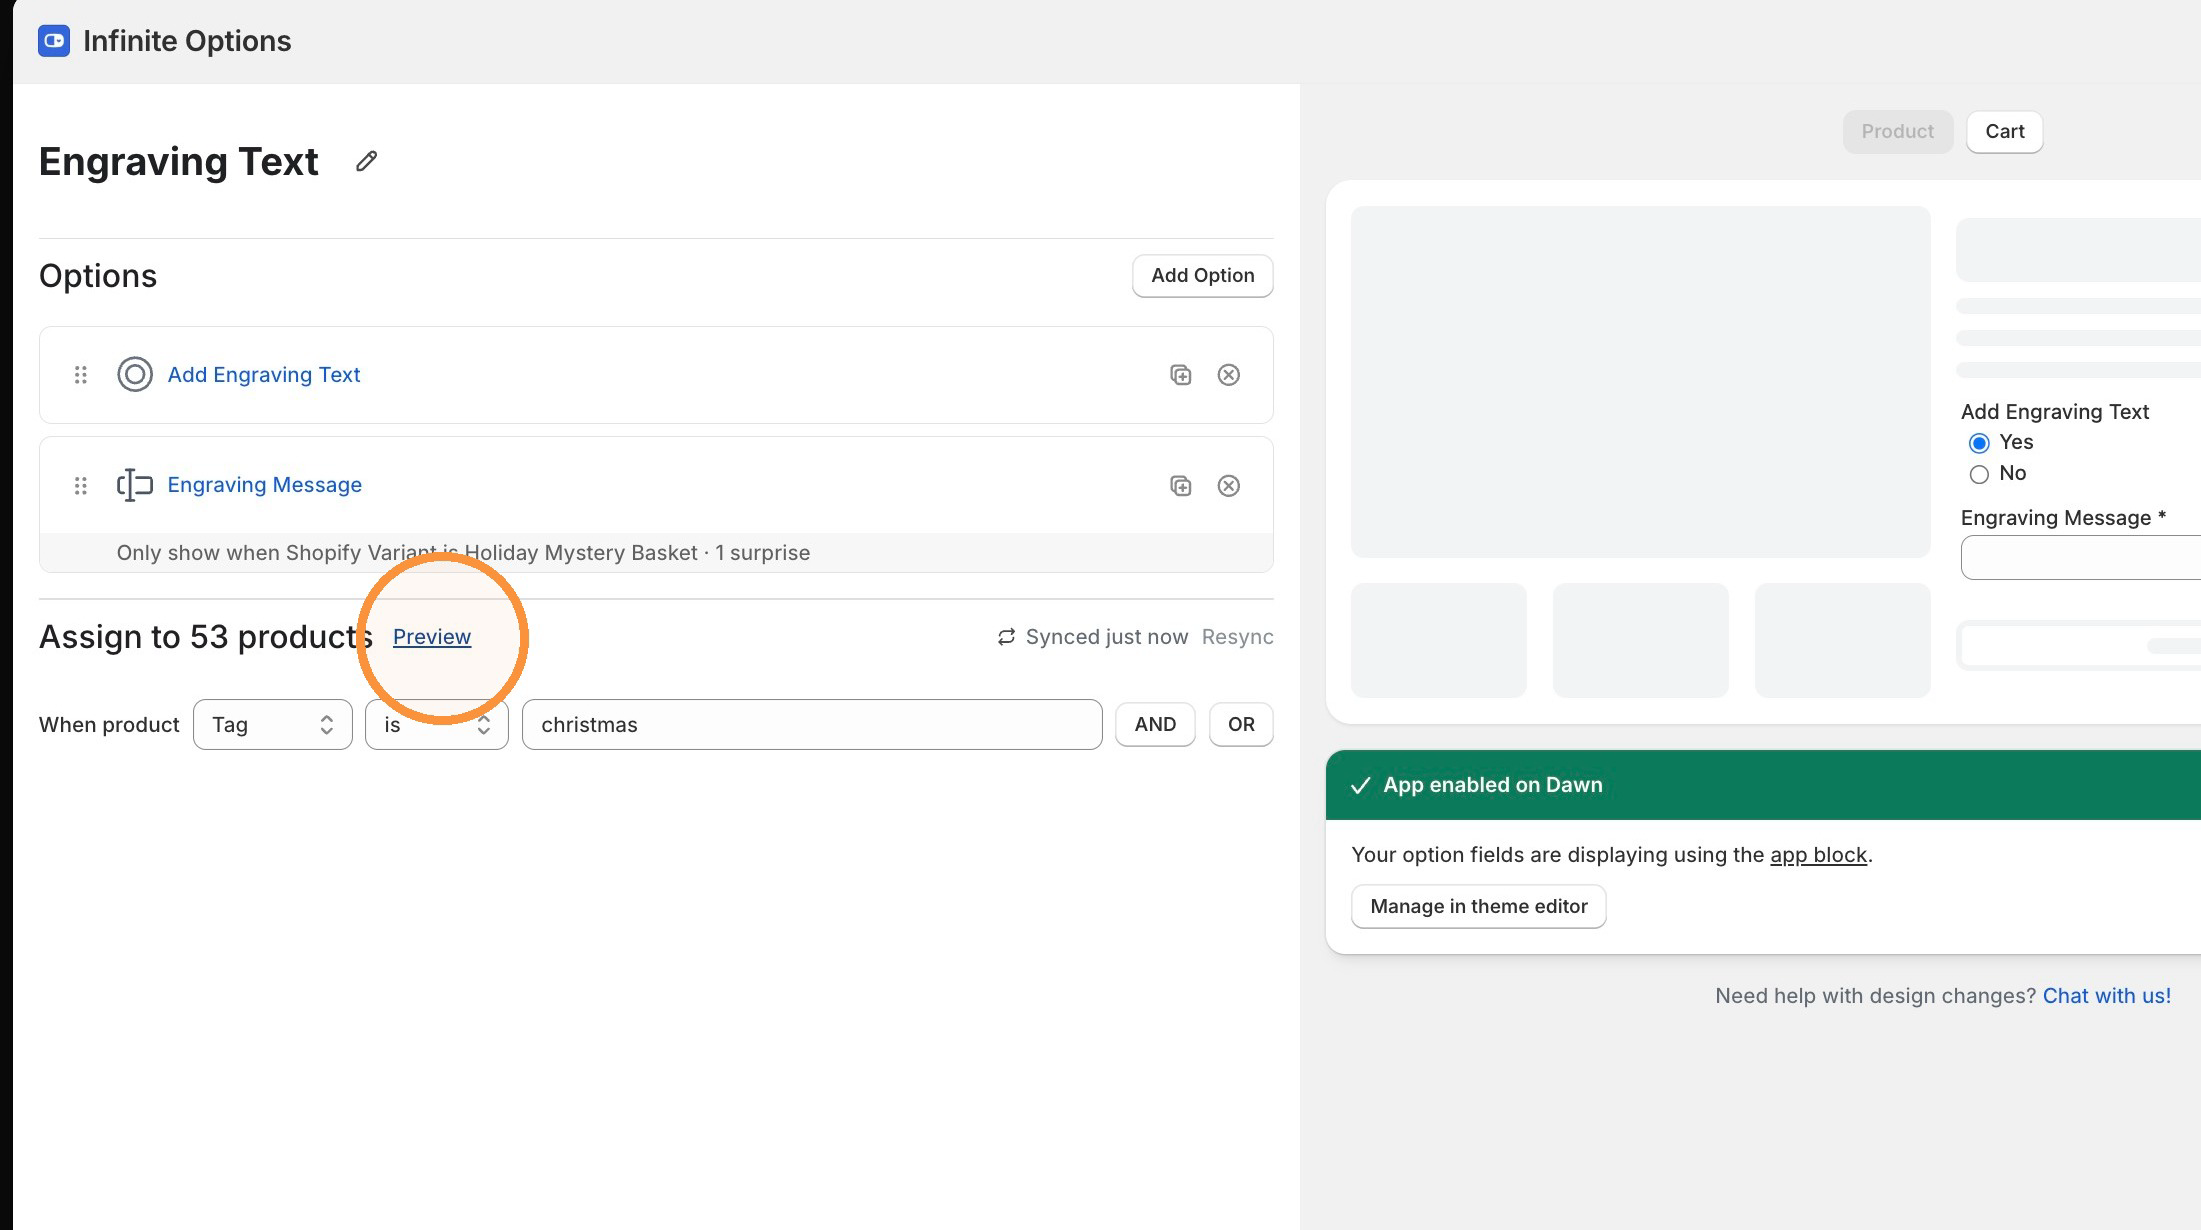
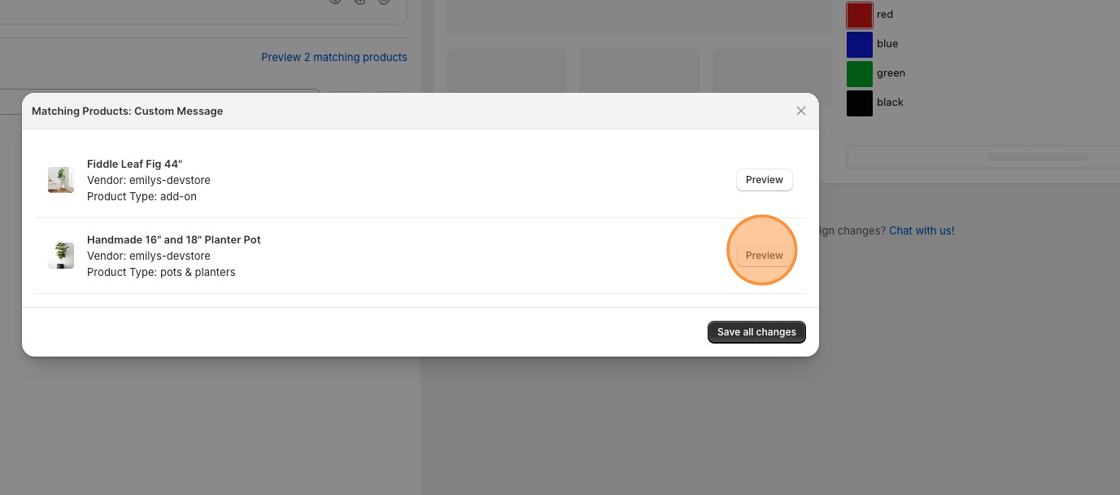
Section titled “Step 4: Preview Your Assignment”Click Preview to confirm the correct products are included before saving.
Step 5: Save Your Changes
Section titled “Step 5: Save Your Changes”Click Save.
Need to Exclude a Few Products?
Section titled “Need to Exclude a Few Products?”If most of your products should display the Option Set but a few shouldn’t, see:
dont-display-options-on-certain-products.md
Need Help with Bulk Actions?
Section titled “Need Help with Bulk Actions?”If you’re new to selecting and tagging products in Shopify, Shopify has a guide on bulk actions explains how to update multiple products at once.