
Manually reposition Infinite Options on 2.0 Theme
General guide to manually placing the Infinite Options Fields block in any Shopify 2.0 theme product template, for custom option placement.
Turning on the Infinite Options app embed is the only thing you need to do to enable Infinite Options on a 2.0 theme. Once it’s toggled on, your options automatically display above the Add to Cart button on your product pages, no other setup required.
The app embed places your options in the default position, above the Add to Cart button.
Follow the steps below only if you want your options to appear at an exact spot instead. This involves adding the Infinite Options Fields block to your product template manually.
Step 1: Open the Theme Editor
Section titled “Step 1: Open the Theme Editor”From your Shopify admin:
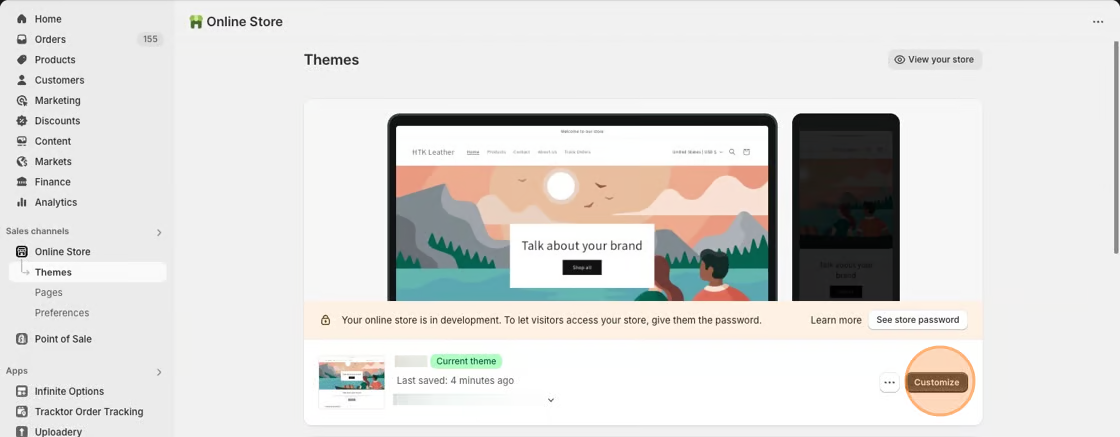
- Go to Online Store > Themes.
- Find the theme you want to use.
- Click Customize.
Step 2: Open a Product Template
Section titled “Step 2: Open a Product Template”In the theme editor:
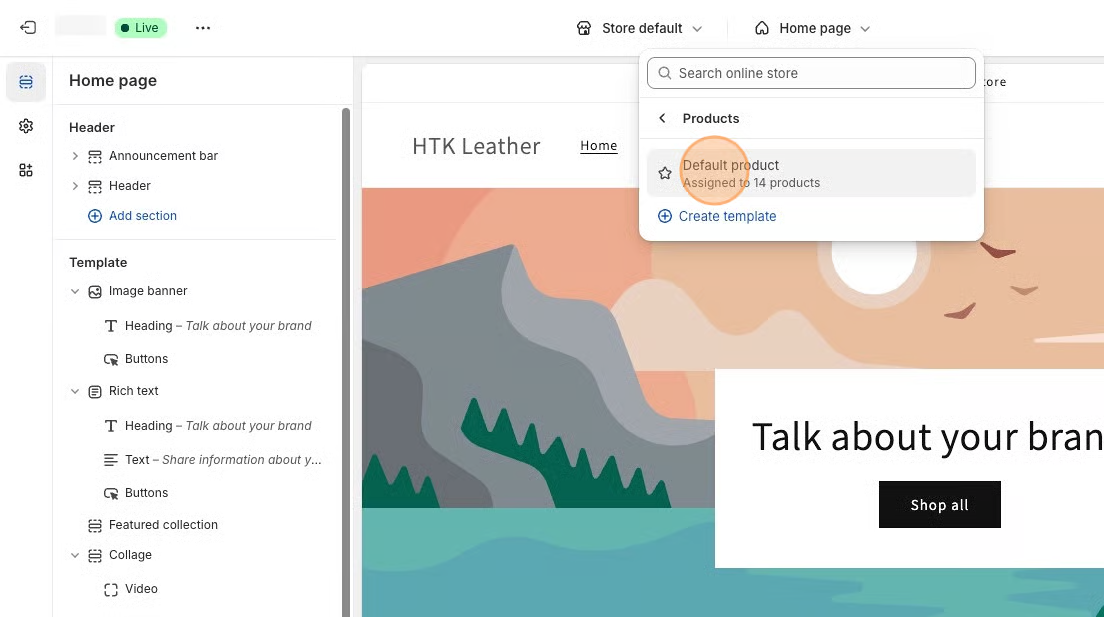
- Use the page selector at the top of the screen.
- Choose Products.
- Select the product template you want to edit.
If your store uses multiple product templates, you’ll need to add the Infinite Options app block to each template where you’d like options to appear
Step 3: Add the Infinite Options Block
Section titled “Step 3: Add the Infinite Options Block”In the left sidebar:
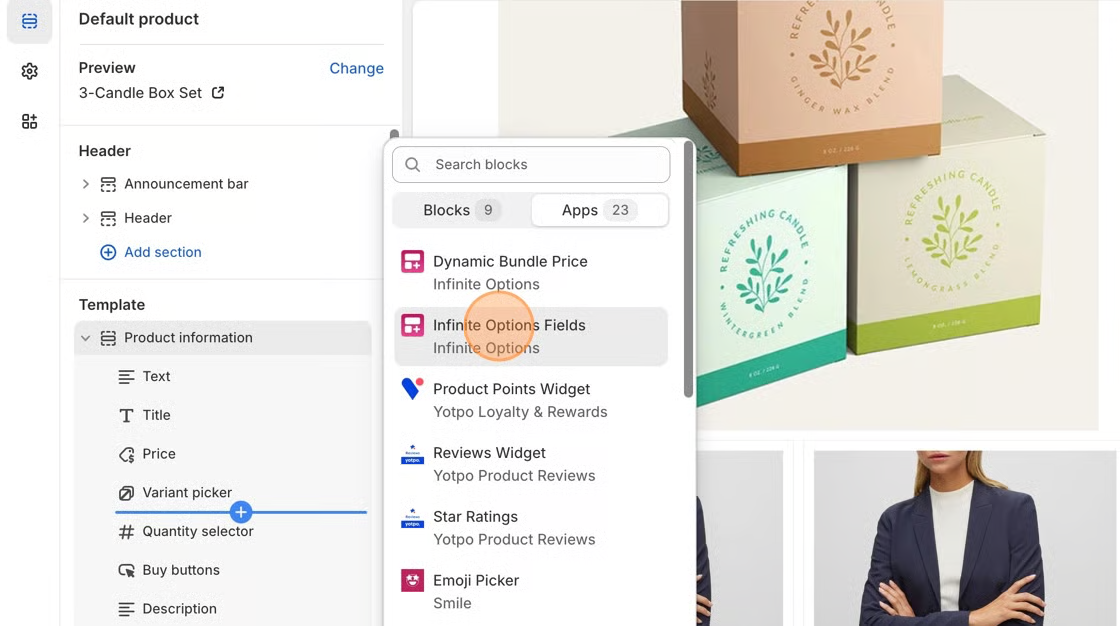
- Select the Product information section.
- Click Add block.
- Choose Apps.
- Select Infinite Options Fields.
- Position the block where you’d like your options to appear, such as above the Add to cart button.
Step 4: Save Your Changes
Section titled “Step 4: Save Your Changes”Click Save in the upper-right corner of the theme editor.
Your theme is now ready to display your custom options.
Step 5: Check That Infinite Options Is Working
Section titled “Step 5: Check That Infinite Options Is Working”Now that you’ve installed the app block, it’s time to make sure everything is working.
Infinite Options won’t appear while you’re editing products in Shopify. Instead, your custom options appear on the page where your customers buy your product.
To check your option:
- In Shopify Admin, open the product you assigned your option set to.
- Click Preview or View.
- If your store is password protected, enter your storefront password.
- Look for your option above the Add to cart button.
If you see your option, your installation is complete.
You’re in the right place if you can see:
Section titled “You’re in the right place if you can see:”- Your product photos
- Your product title
- Your product price
- The Add to cart button
If you can see these, you’re viewing the same page your customers will use.
Your Infinite Options fields should appear above the Add to cart button.
Still don’t see your option?
Section titled “Still don’t see your option?”Before checking your setup, make sure you’re looking at the customer-facing product page.
Infinite Options will not appear:
- while editing products in Shopify
- in the Shopify product editor
- inside the Infinite Options app
It only appears on the page where customers buy your product.
If you’re on the correct page and still don’t see your option, continue with the troubleshooting steps below.
Troubleshooting
Section titled “Troubleshooting”
Still don’t see your option?
Section titled “Still don’t see your option?”Before continuing, make sure you’re checking the customer-facing product page.
If you’re viewing the Shopify product editor or the Infinite Options app, you won’t see your custom options.
Next, confirm your option set is assigned to the correct product.
Infinite Options supports assigning option sets by:
- Product
- Product tag
- Product type
- Vendor
- All products
If you’re assigning by tag, make sure the product tag matches exactly.
For example:
❌ Cookie-box-4
✅ Cookie Box (4 Pack)
As you type, Infinite Options will suggest matching tags. Once you’ve selected the correct tag, you’ll also see a Preview 1 matching product link. This is a quick way to confirm your option set is assigned to the intended product before checking your product page.

Even a small difference in the tag will prevent the option from displaying. You will see the text display “0” matching products

Adding Additional Pricing?
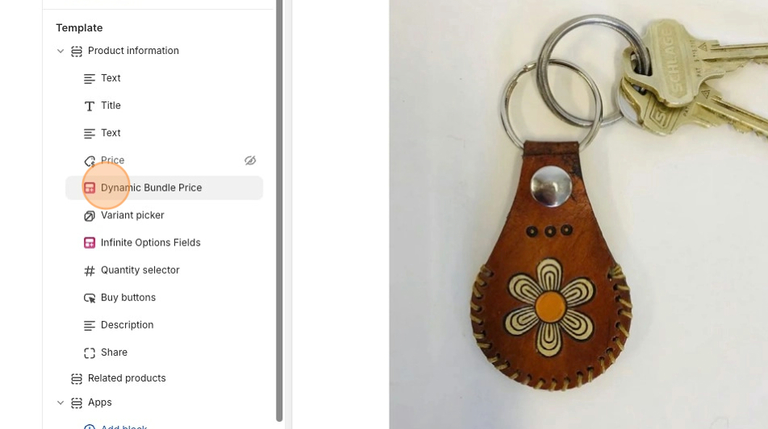
Section titled “Adding Additional Pricing?”If you plan to charge for options using Native Bundling or Product Bundles, you may also need to add the Dynamic Bundle Price block so the product price updates when paid options are selected.
You can add it in the same product template by clicking Add block → Dynamic Bundle Price.
Next Steps
Section titled “Next Steps”If your option appears on your product page, you’re all set!
If your option still isn’t showing, continue to the My options are not showing troubleshooting guide for additional troubleshooting steps.